
You gotta truly love someone if you’re making this for them, it’s a labour of love but hey it’s honestly so worth it. DELICIOUS.
The best part when I made this for my workmates is how it reminded them of a childhood memory, or just made them feel at home after they’ve had one. It’s a true comfort food that I’d have any day of the week, but especially in the afternoon with coffee, like how we did with my lola when I was a youngin. (Yes I started drinking coffee when I was in my grade school days and I guess how I became a *caffeinated* baker)
Filipino Spanish bread
Filipino afternoon tea treat that packs on nostalgia from the first bite!
Equipment
- Stand mixer
- Kitchen scales
Ingredients
Dough
- 400 grams flour
- 50 grams sugar
- 4 grams salt
- 8 grams active dry yeast
- 230 grams milk
- 1 whole egg
- 45 grams unsalted butter, melted
- fine breadcrumbs for dusting
Spanish bread filling
- 60 grams unsalted butter
- 6 grams flour
- 30 grams milk
- 110 grams brown sugar
- 50 grams fine breadcrumbs
- pinch salt
- additional melted unsalted butter for brushing
Instructions
Spanish bread filling
- Weigh all ingredients separately because this is going to be a quick process, you would want everything all ready and within arms reach.
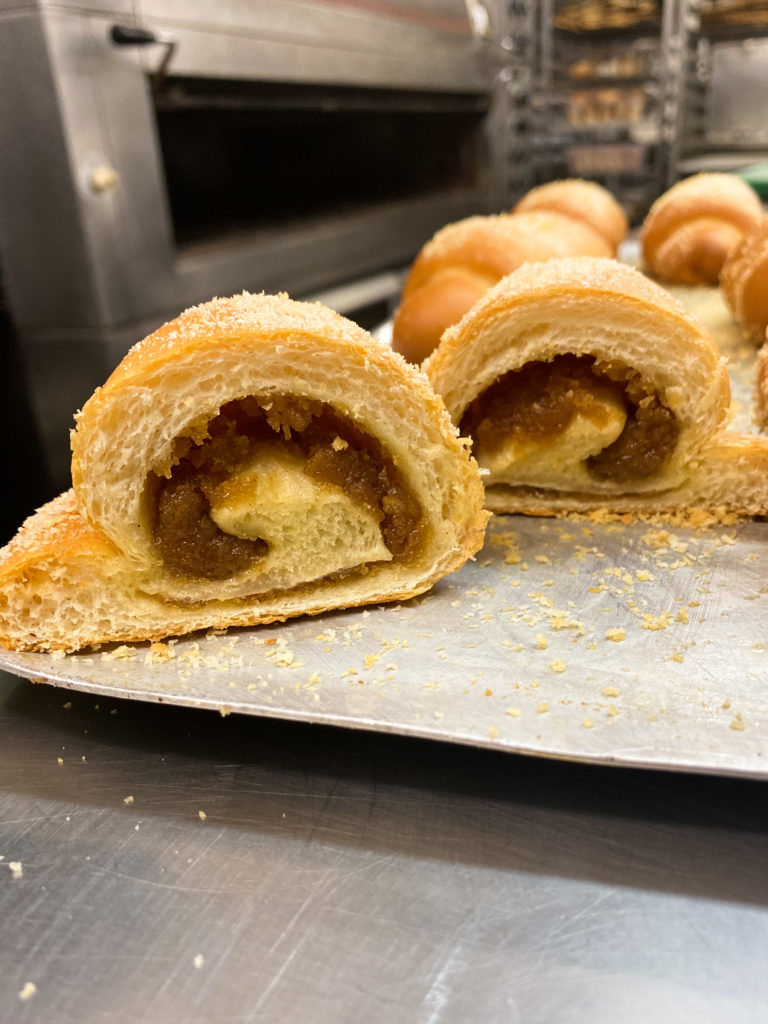
- In a small saucepan, melt the butter on low heat, once melted add the flour and a quarter of the breadcrumbs until thoroughly combined and it smells toasty. Add the milk, brown sugar, pinch of salt and the rest of the breadcrumbs and keep mixing until a thick paste forms. Set aside to cool down.
Dough
- Combine all the dough ingredients, except for the breadcrumbs, in the mixer bowl with a dough hook. Start with the lowest speed and mix until a shaggy dough forms.Switch the mixer on medium speed and knead the dough for 7 minutes, or until the dough has a smooth appearance.
- Place the dough in an oiled bowl and cover with cling film, and let it rise – this stage in bread making is called proofing. Let the dough proof for approximately an hour, or until the dough doubles in size. If it is cool in the kitchen, try to find a warm area to place the bowl for a faster proof.
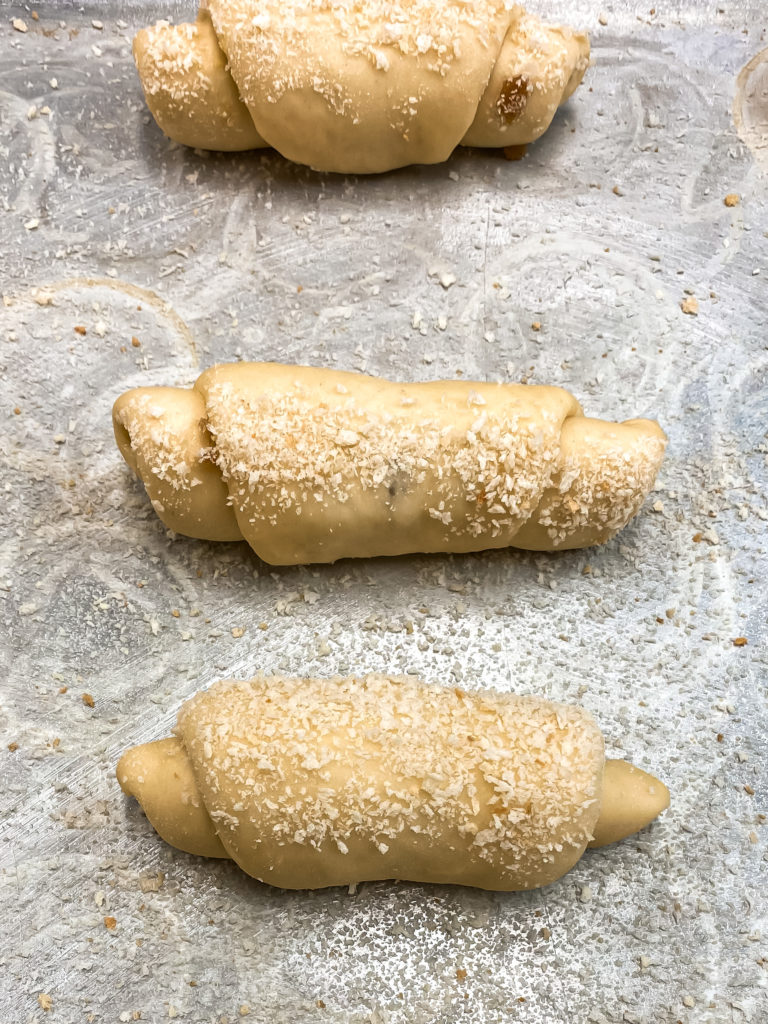
- Once dough is doubled in size, place it on a lightly floured bench to divide into portions. Using a dough scraper/small straight edge knife and kitchen scales, weigh the dough into 60 gram pieces and form them into rough long rolls. Flatten each piece gently and form into triangles – like a pizza. Brush the surface with melter butter or margarine and spread the filling, leaving a small gap on the edges unfilled. Roll the dough starting from the wider side towards the tip of the triangle to enclose the filling. Brush each dough with water or melted butter and roll into the breadcrumbs. Place the rolls into a greased flat tray with a sprinkling of breadcrumbs leaving a gap between each roll because this will rise once more. Proof the rolls once more until it is 1 ½ times bigger in size.
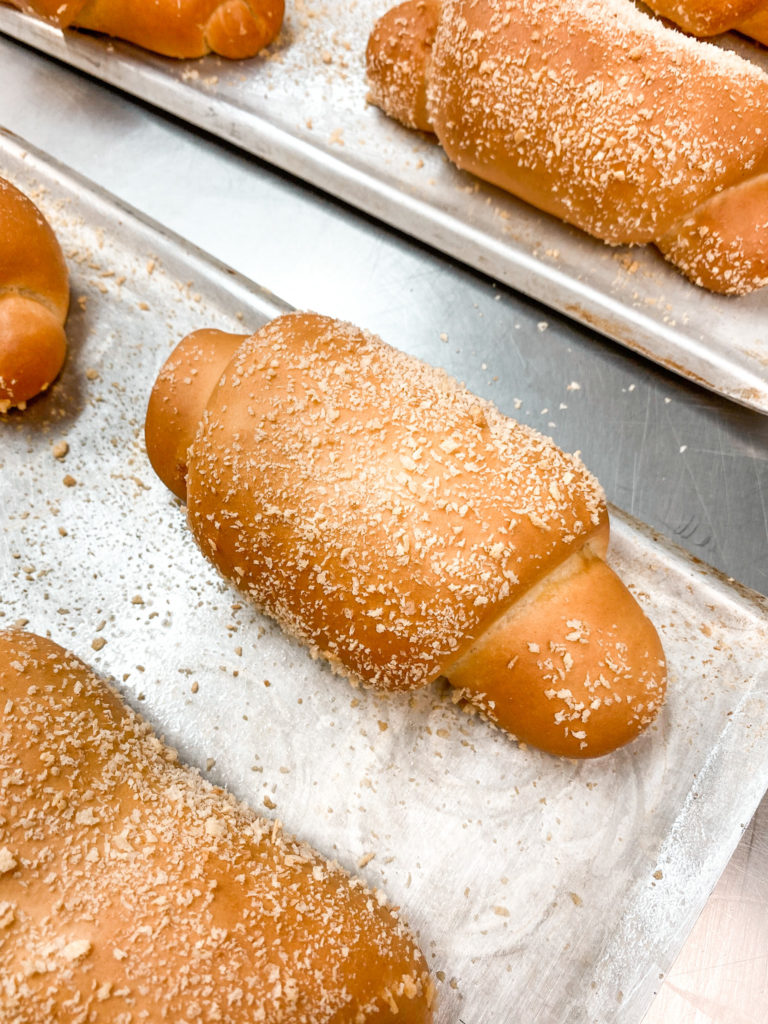
- While waiting for the rolls to proof, preheat the oven to 175°C fan bake. Once the rolls are ready, bake them for approximately 20 minutes or until golden in colour. This is best served warm.°
Notes
- In bread making, temperature plays a massive role in to how the end product will turn out. The temperature of the water, in my opinion, is the most important to take note of, for the reason being; if it is too warm before the kneading process actually begins, this will kill the yeast and therefore leading to very dense bread.
- The length of proofing, again, heavily relies on the temperature of the kitchen and humidity. I cover my dough with cling film to keep it from forming a skin; if the surface of the dough forms a skin this will prevent the dough from rising.
- The breadcrumbs plays many rolls (pun intended, I’m not sorry) it adds crunch to the bread and also acts as an insurance policy so the bread doesn’t stick to the tray in the event that the filling spills out.
- Be generous with the filling, it’s arguably the best part of the bread.
- If you’d like to achieve more “layers” in the roll for aesthetic reasons, make a longer triangle.
I hope you’ll love these as much as I do! Please let me know in the comments any feedback 🙂
Happy baking! – Alyana
